TEAMS
Frequently Asked Questions
Team Settings
The Teams feature allows groups of users to share branding and listing access across multiple members of a team.
Team
Overview
Snap2Close’s Teams feature allows groups of users to share branding and listing access across multiple members of a team. This feature should be especially useful for any users who have assistants or coordinators that commonly order or manage media on their behalf.
Creating or Joining a Team for the First Time
All users will have a team by default, which initially will consist of just one member (themselves). When you first click the Team icon on the left menu then a “Details & Members” display will will appear (sample image).
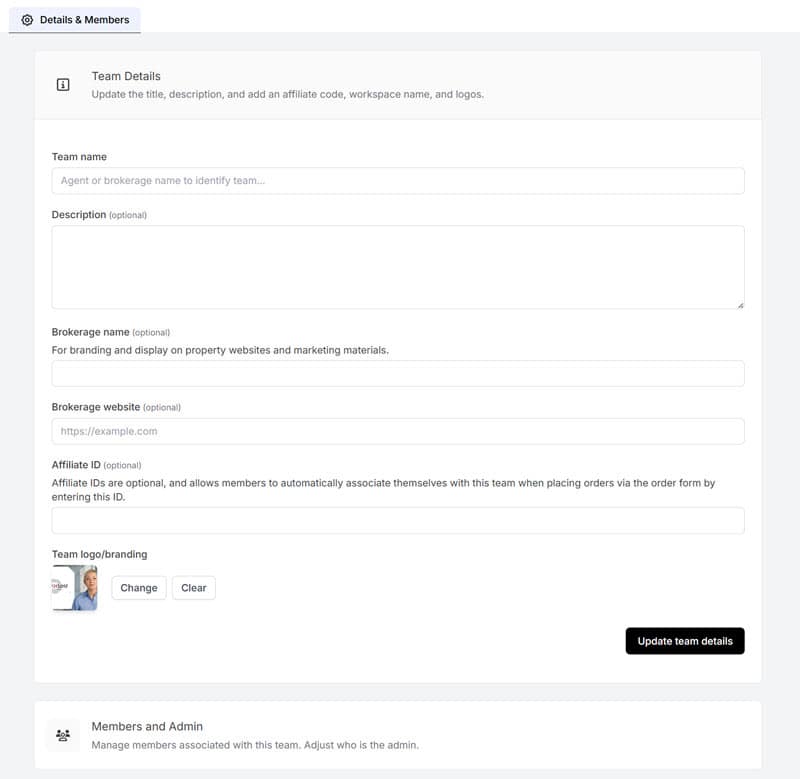
Team Details
This section allows you to create your Team name, a description of your Team, your brokerage name, brokerage website, optional affiliate IDs, and your Team’s logo. Snap2Close proposes that you create an Affiliate ID for your team which will allow other people to quickly join your Team.
Members and Admin
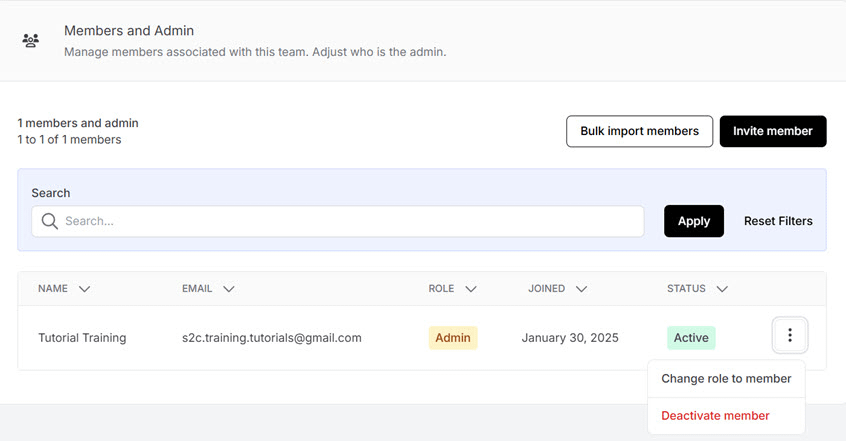
This section allows to invite and add members to your team, assign their role as either Admin or Member, the date they joined the Team and their membership status. The 3 dots menu bar next to their status allows you to change their role or to deactivate them as a team member. (sample image)
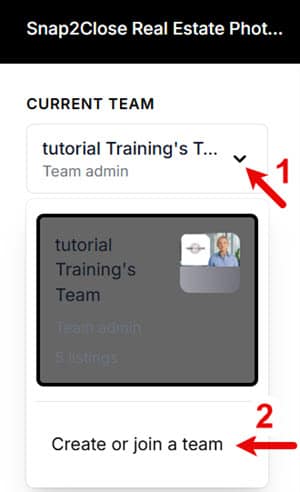
If you’d like to create or join a new team, click the dropdown in the top left corner of your dashboard and then click ‘Create or join a team’:
Additional Ways to Join or Start a Team
All users will have a team by default, which initially will consist of just one member (themselves). If you’d like to create or join a new team, click the dropdown in the top left corner of your dashboard and then click ‘Create or join a team’ (sample image):
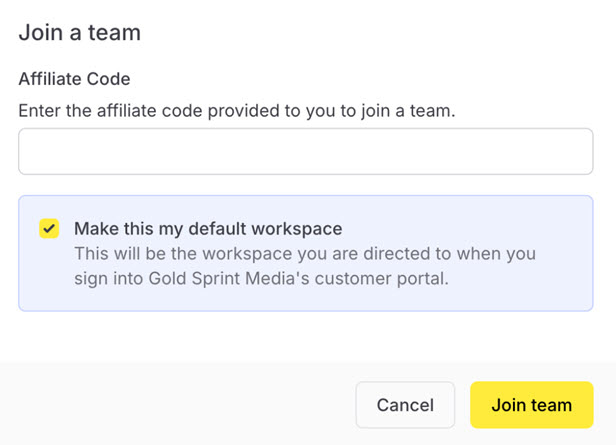
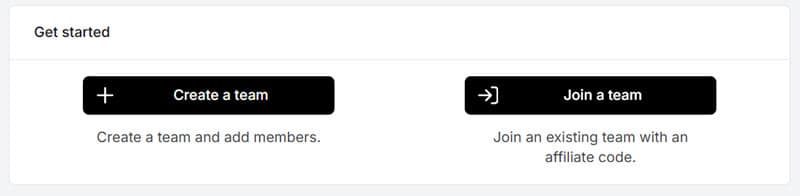
You will then see the option to either ‘Create a team’ or ‘Join a team’ (sample image):
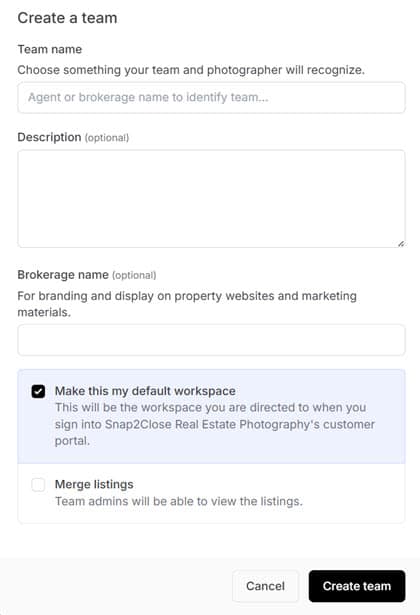
Clicking ‘Create team’ (sample image) will ask you to choose a team name, and optionally a description and brokerage name before creating the team. Please consult with your broker or manager before creating any new teams of your own.
If a team already exists that you want to join, select ‘Join a team’. Then enter the affiliate code and click ‘Join team’ to be added to the team. By default, you will start with the member role. (sample image) If you should have admin access, please contact anyone on the team with admin access or your photography company so that they can assign you the admin role.
Finding Affiliate Codes
Any admin on an existing team will be able to see the ‘Affiliate ID’ field within their team settings page. (sample image) Your photography company can also access these Affiliate IDs:
Switching Between Teams
To access the Teams feature inside your account, first click the dropdown menu in the top left corner of your dashboard to view the Teams dropdown. This dropdown will show all teams that you are currently a member of. You can change teams by clicking on the team you want to switch to. You can also create or join a team by selecting the “Create or join a team” option.
Your ‘default’ team is the team that will be chosen for you by default when placing new orders.
User Roles
As of October 2024, Teams now supports user roles. All users of a team will either have a ‘Member’ or an ‘Admin’ role. Members can only view their own listings and place orders for themselves. Admins can view the listings of all members of a team, place orders on behalf of any member in the team, add users to the team, change the roles of users on the team, and update some team settings.
Actions available to users with the ‘Member’ vs. ‘Admin’ role as as follows:
MEMBER
ADMIN
For most teams, the ‘Admin’ role should be assigned to anyone who serves a coordinator or admin role on behalf others. Individual agents who don’t have the need to access the listings of others should generally be given the ‘Member’ role.
Managing Team Settings
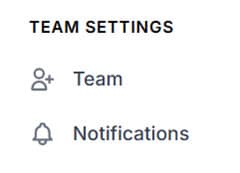
Those members with admin status on a team will be able to access the Team details page by clicking ‘Team’ under the ‘Team Settings’ section of the left-hand side menu: (sample image)
Admins can then update the team’s details as well as manage membership on the team by selecting “Team Details” or “Members and Admin”. (sample image).
Adding New Members to a Team
Admins can view the roster of the team and add new users (either by bulk import or individually). Once a member is added, they will need to accept an invitation to join before formally joining the team. Admins can then change the role (Admin or Member) of each user, or archive users. (sample image)
Archiving
Admins can archive a user on a Team by selecting the ‘Remove member’ option within the ‘Members and Admin’ settings. An archived team member will not be able to view listings associated with the team that they are not a customer on, will not be able to access any team settings, and will not be able to place new orders associated with the team.
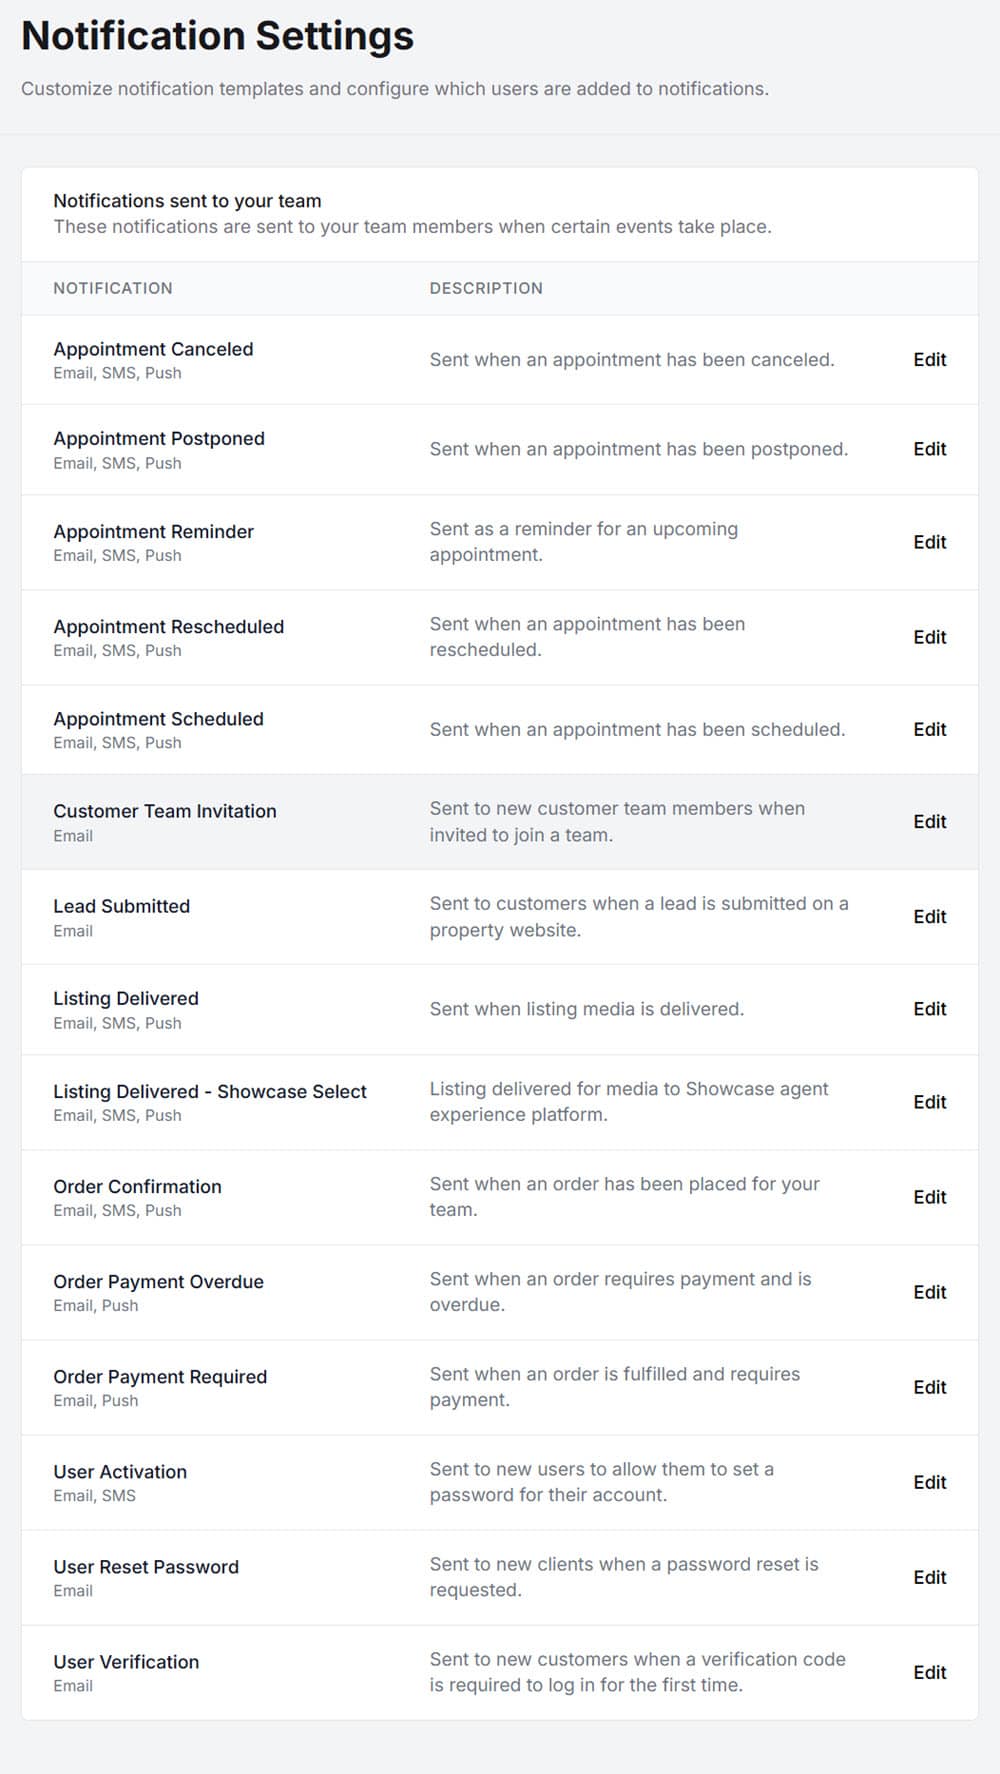
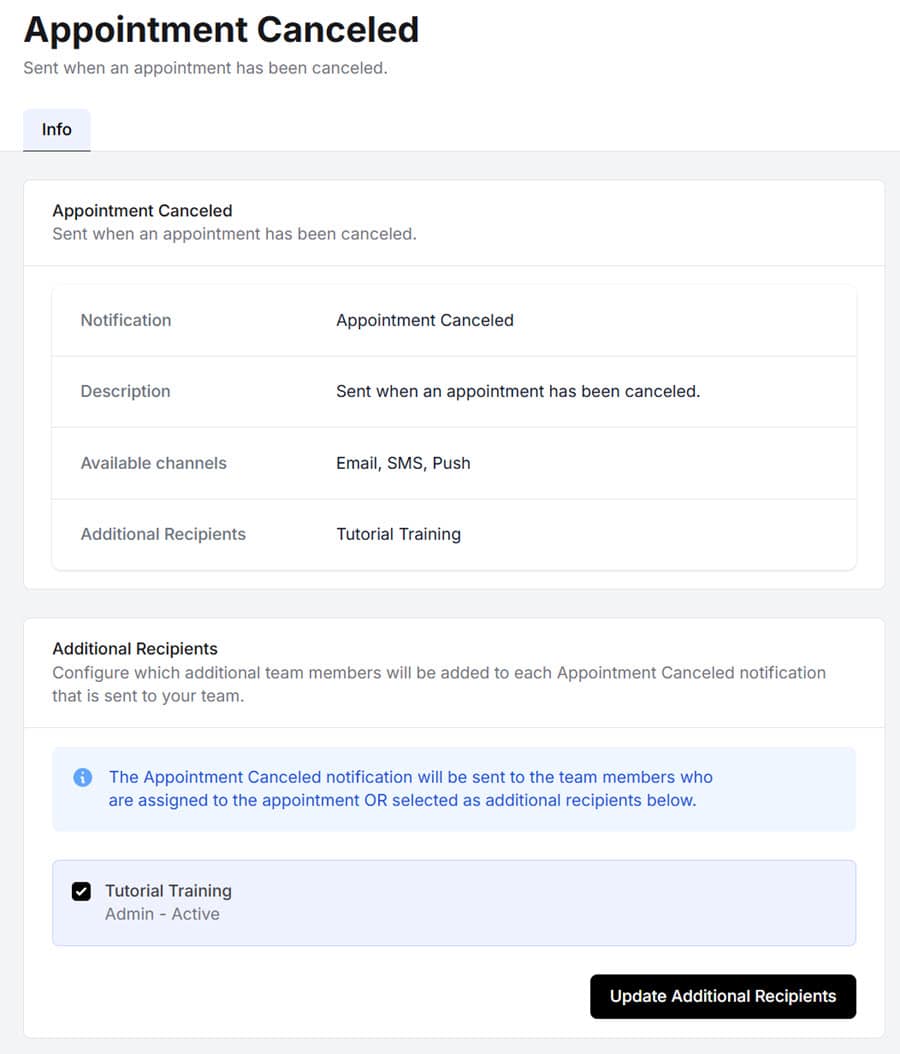
Admins can adjust the settings to change which notifications they and other admins on the team receive. By default, these will be turned on for all admins. Notifications can be enabled or disabled on an individual admin-by-admin basis after clicking ‘Edit’ next to each notification. (sample 1 image) and (sample 2 image).
Available channels for notifications are Email, SMS (text) and Push. Note: Push notifications applies to customers who have installed the Snap2Close Apple or Android apps.
Ordering
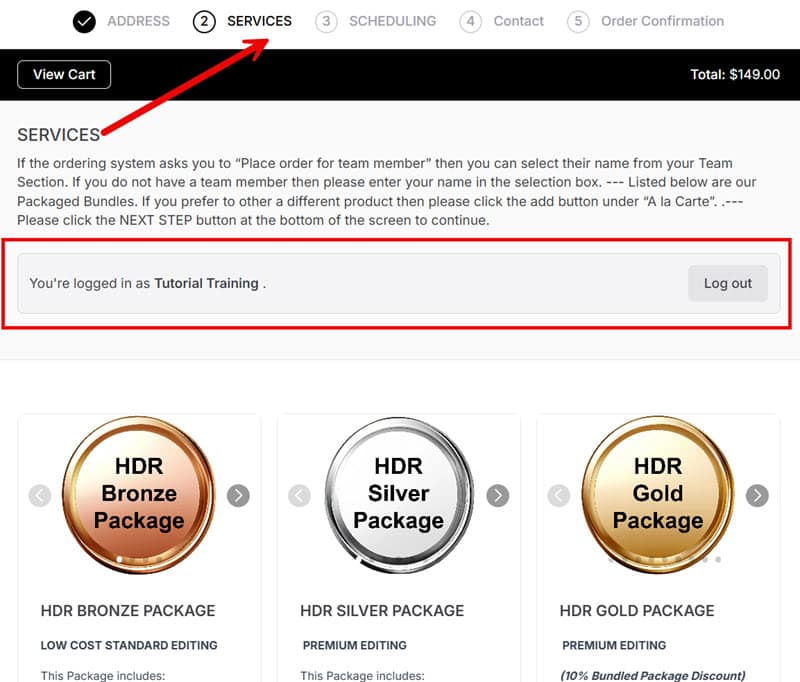
Team admins have the ability to place orders on behalf of others. To do this, they need to first enter an order form (available from the ‘Place order’ button in the top left corner of the dashboard). Once they have arrived at the ‘Services’ step of the order form, they will need to make sure to:
- Log in at the ‘Services’ step
- Select the team they want to order on
- Select the team member they want to order on behalf of (sample image)